Quantcast
Channel: Nada's London kitchen
Viewing all 290 articles
Browse latest View live

Moroccan baghrir 100% semolina

$
0
0
Baghrir is a North African pancake with countless holes. It's also found in the Middle East and a few other places.

We usually serve baghrir with a warm mix of honey and butter, either for breakfast, for afternoon tea. It's also part of the first meal to break the fast during Ramadan and sometimes the last meal before dawn.


You could stuff baghrir with nuts to make nice filling pockets (just like it's done in the Levant) which get fried or baked then soaked in honey.

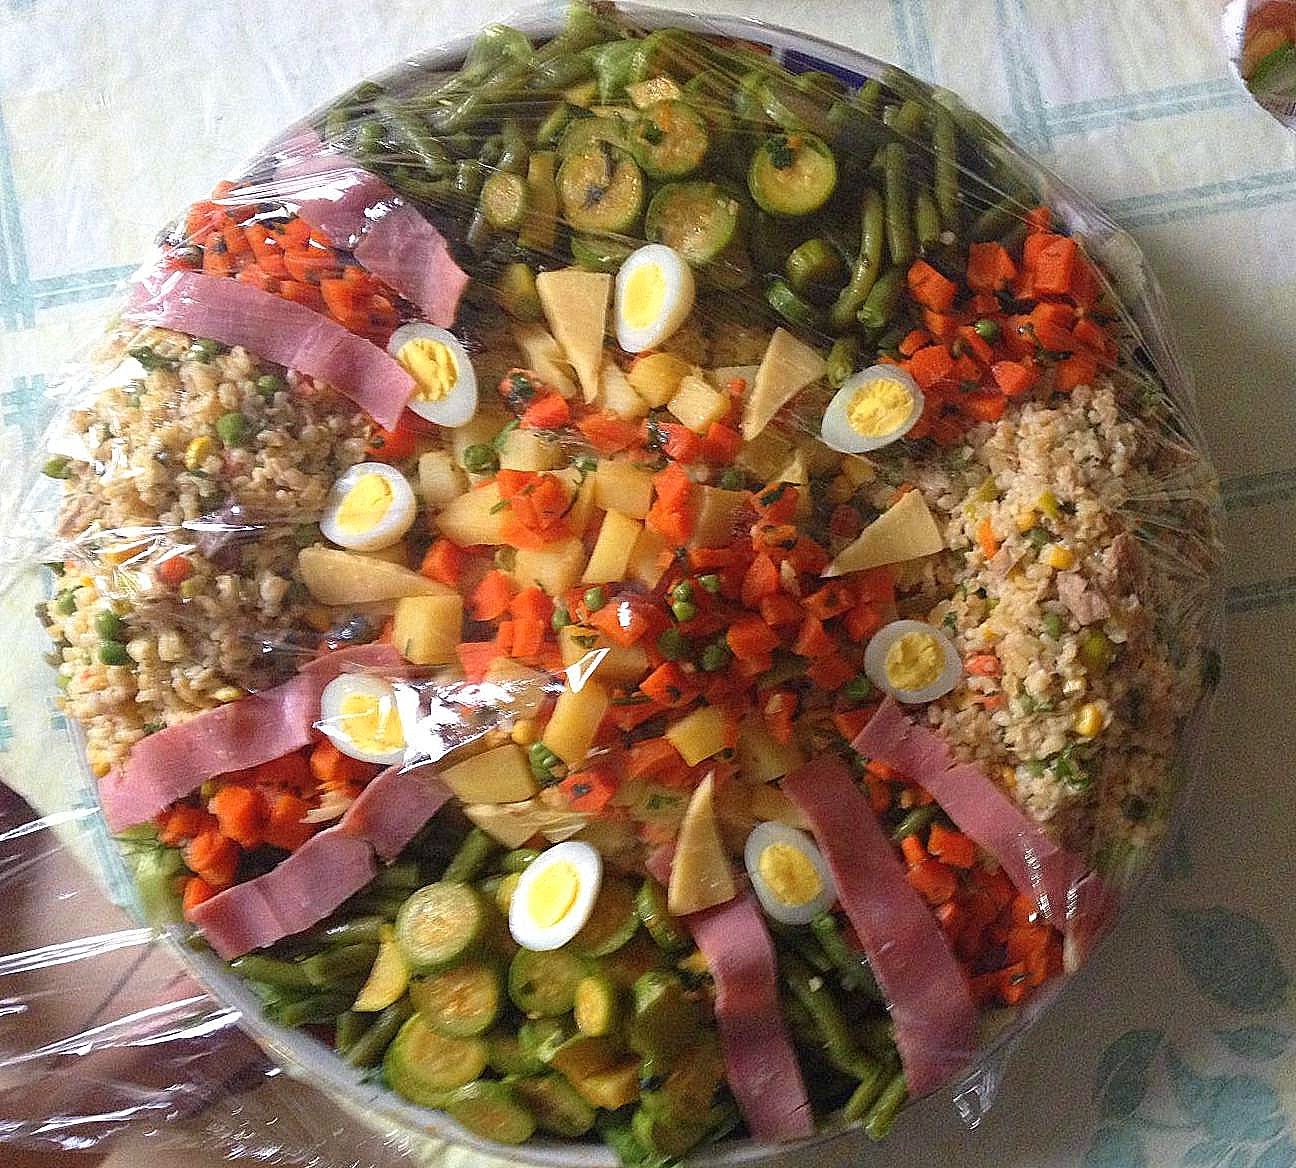
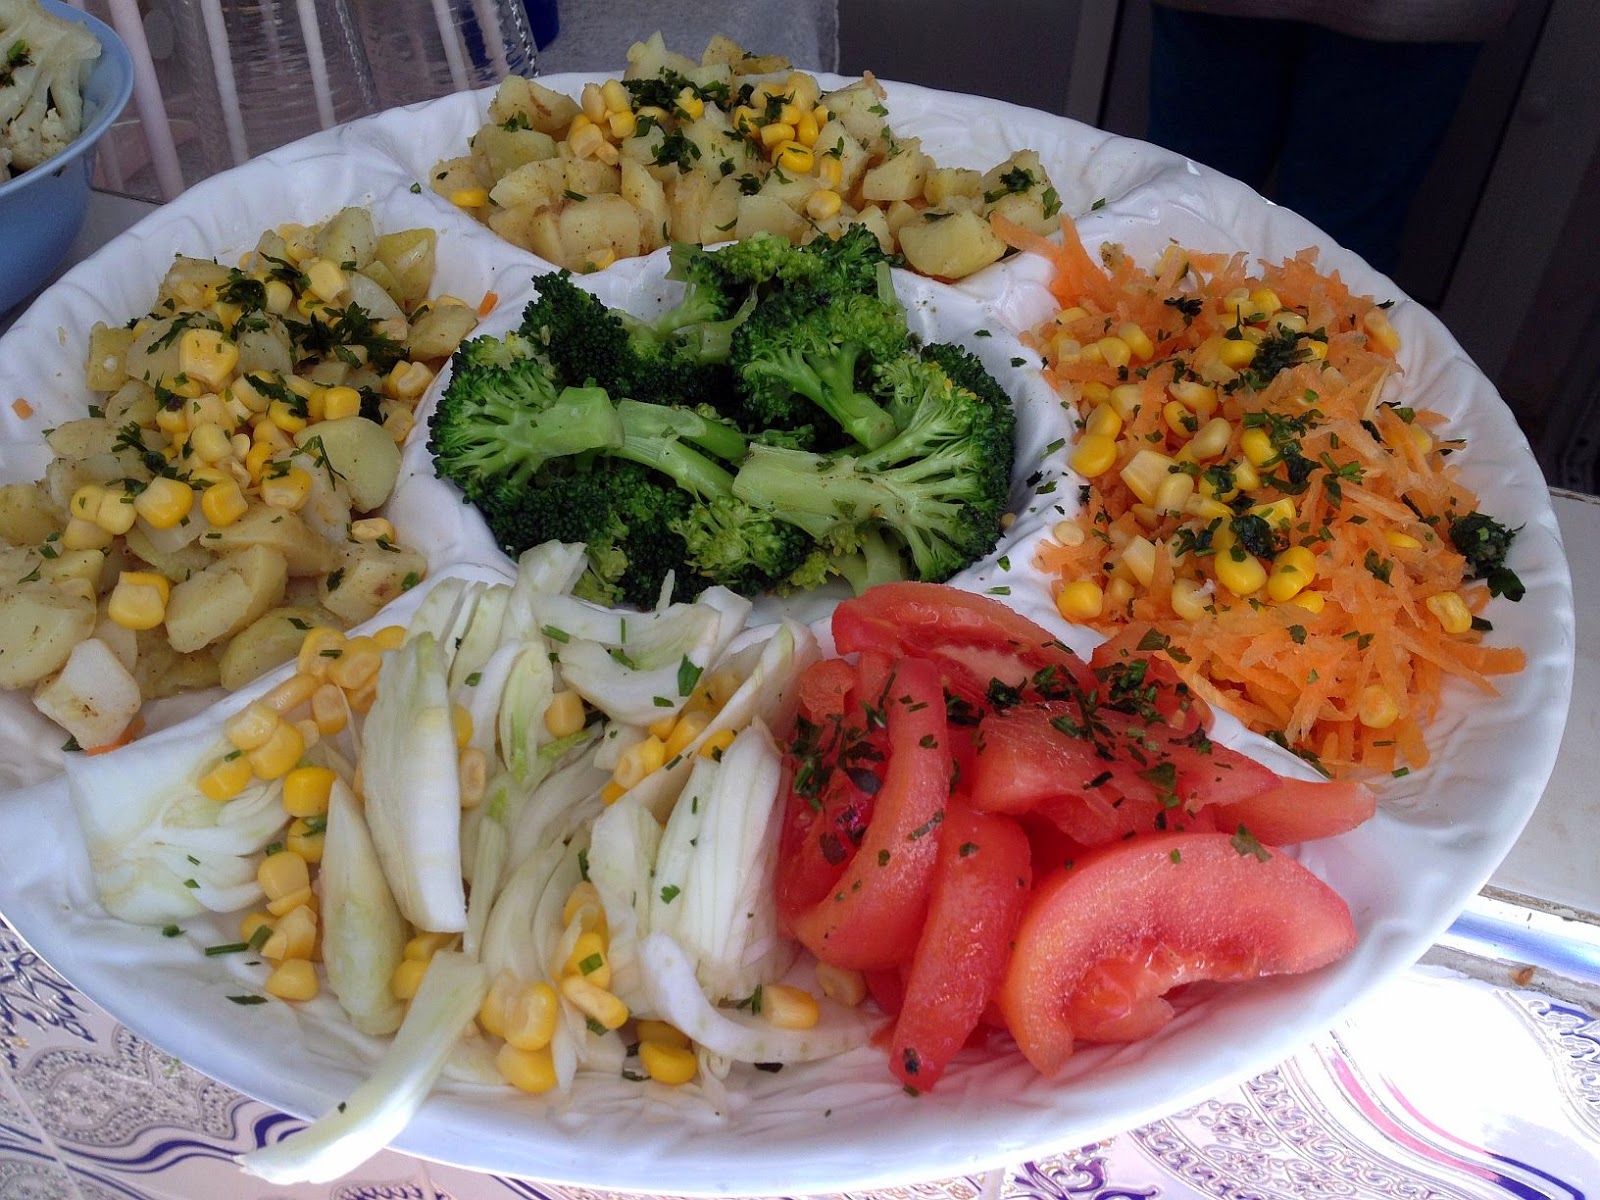
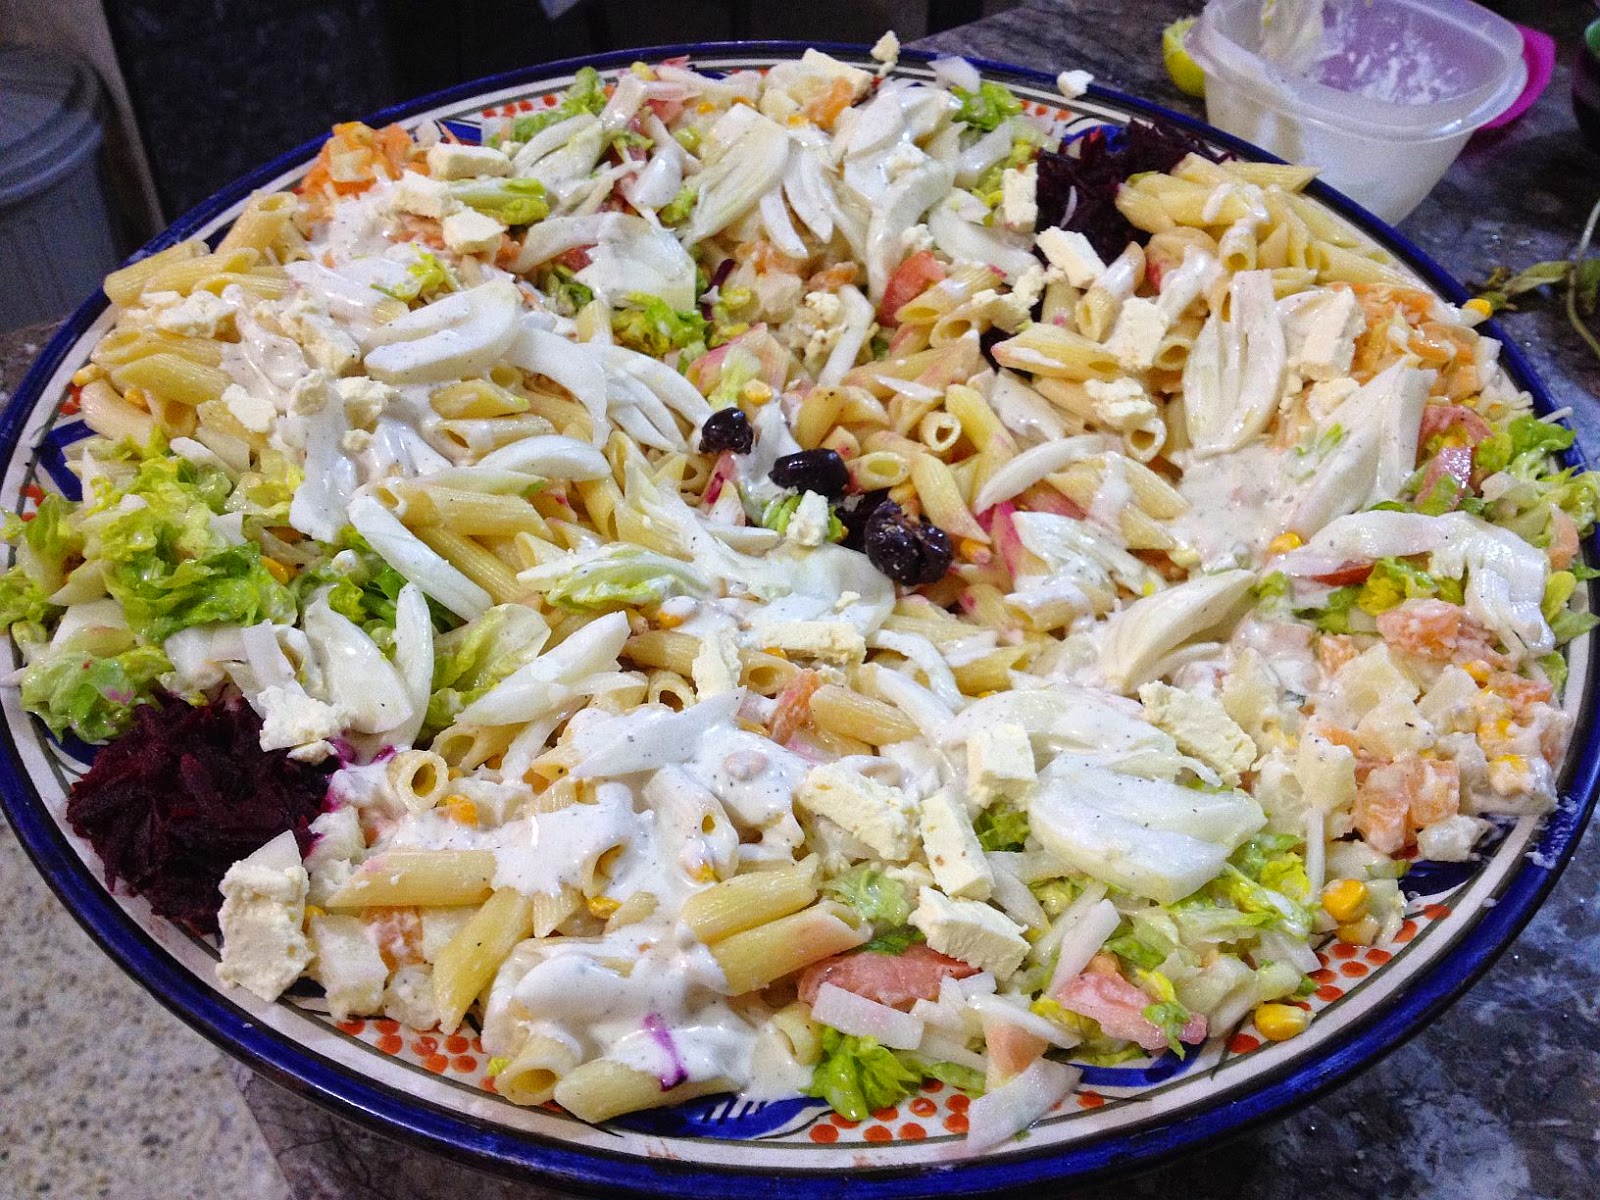
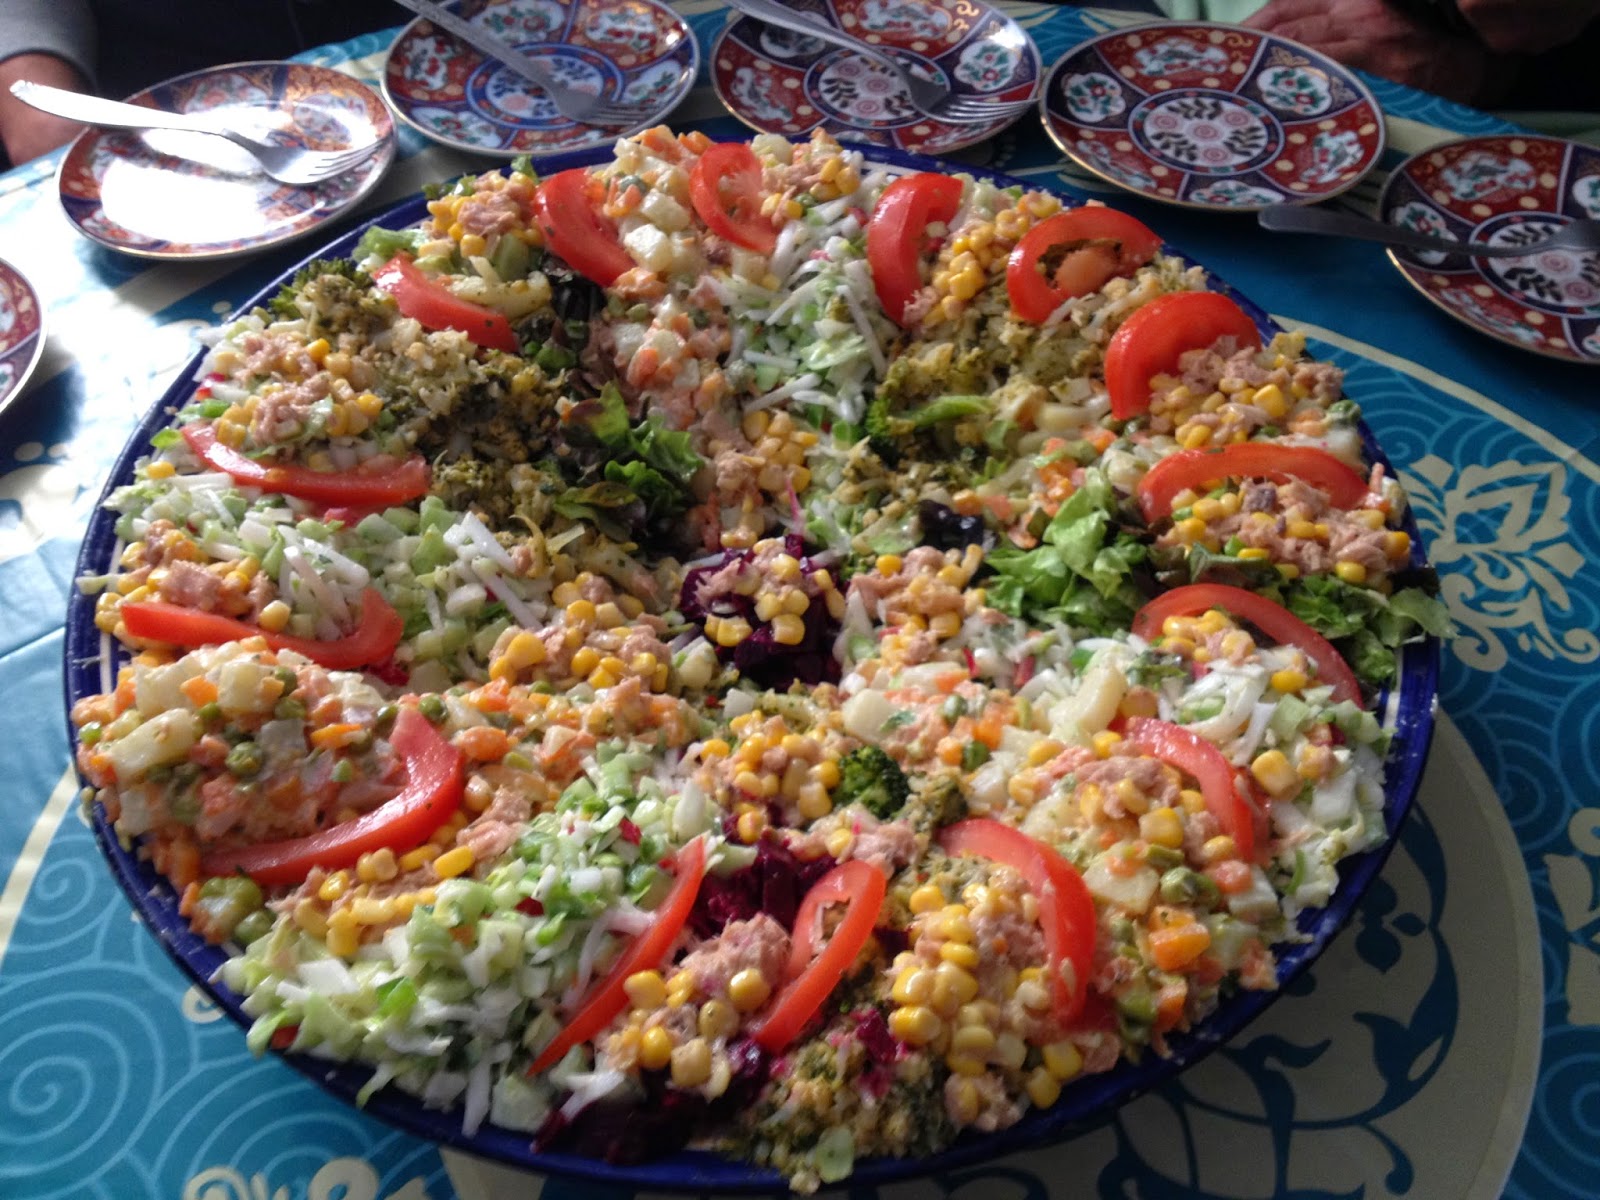
I recently filled it with a savoury mix, baked it and served it with a salad for a light meal. I liked the crispy outside and the soft inside this version has given.


I have posted a few posts about the usual recipes for a standard baghrir but I forgot an old one which uses 100% semolina. I know that some people prefer omitting white flour in the mix, so this is the recipe they're usually routing for. The texture is wonderful and it's usual yellow-ish than any other version.


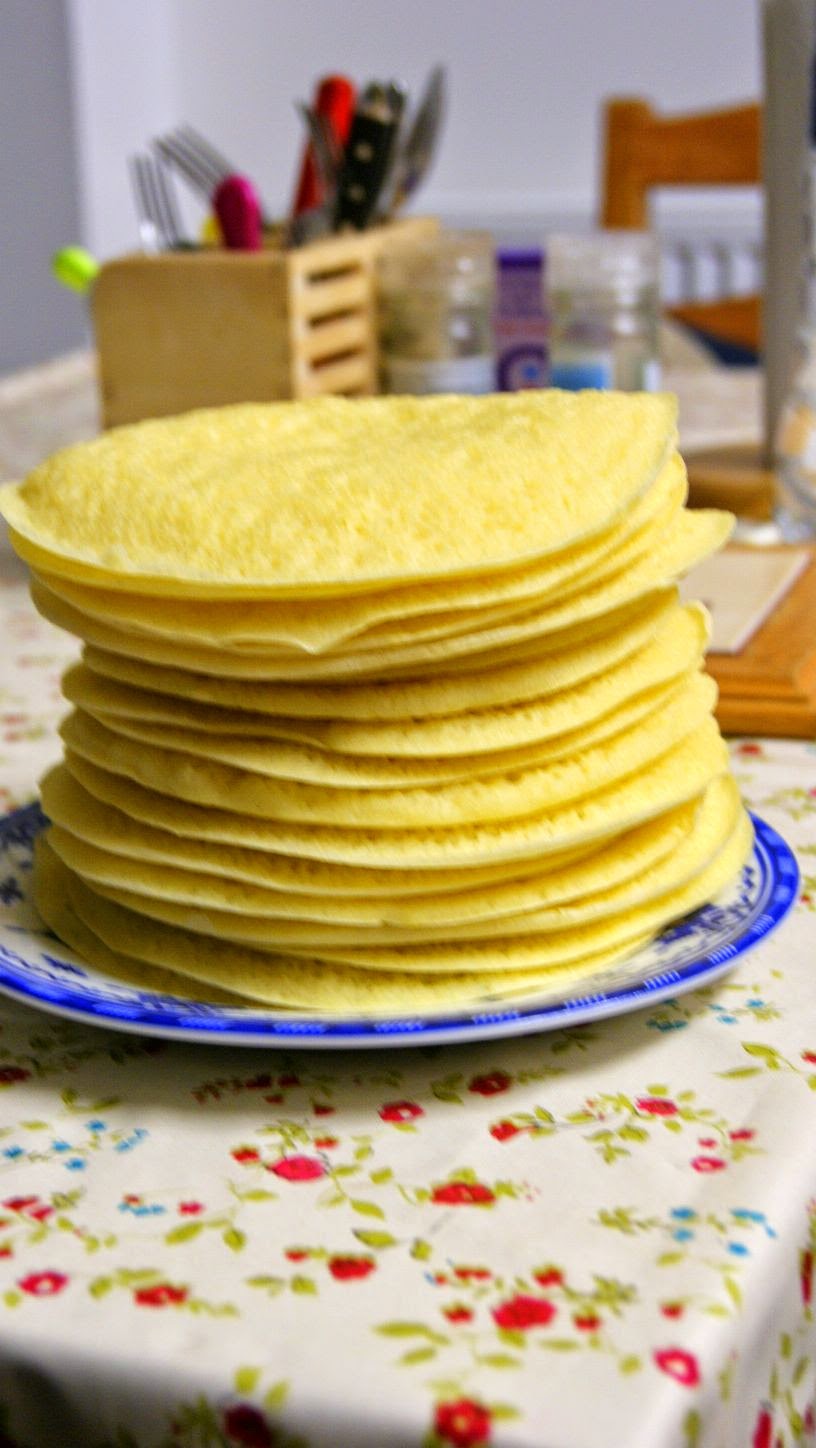
A big pile of large semolina baghrir, ready for a morning brunch with the family
I used a glass to measure but I have the precise measurements on the side.


Ingredients
Makes about 20 baghrirs (medium size)
Prep: 3 min- Cooking: less than 2 min/ baghrir (a big pancake griddle goes faster than individual frying pans)

  • 300 g (2 measures) of coarse semolina (not couscous)
  • 150 g (1 measure) of fine semolina flour
  • 640 ml (4 measures) of water, lukewarm
  • 10 g of instant dried yeast
  • 14 g of baking powder
  • 1 tsp of salt
Top: Fine semolina flour. Bottom: coarse semolina


Preparation

Mix all the ingredients in your blender starting with water then the dry ingredients. Whiz up for 1 minute.

Pour the mixture into a large bowl, cover with plastic wrap and let rise for 45 min to 2 hours until you see the batter full of bubbles.

Stir gently with a ladle.

Baghrir almost ready

Heat a nonstick skillet over medium heat. Lightly oil it with the tip of a kitchen tower/paper.

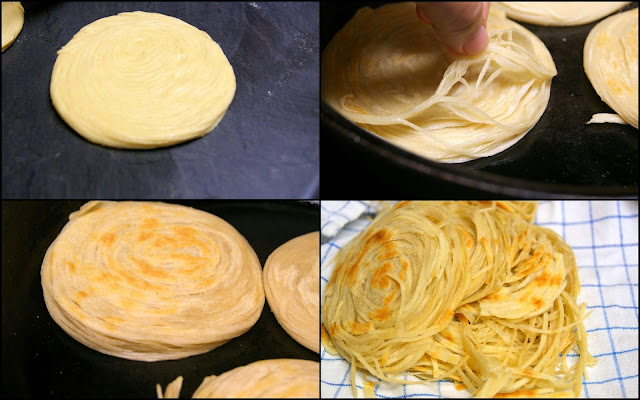
Use a smal ladle to pour the batter into the pan: make sure you start from the middle and then tilt the pan so the batter goes around to cover all the flat surface. Alternatively, you can QUICKLY use the back of the ladle to spread the batter but do it ONLY once and at the very beginning. 


The holes start to form and that’s usually a sign of a successful baghir: a porous and light pancake (Thing of the honey that will go through all these pores). If you see the bottom of the pancake browning fast, take the pan off the heat which you might need to reduce.

Allow a few seconds of cooking until all the bubbles are showing. Cook baghrir for about 2 minutes from one side. In case you see an uncooked spot, just flip it over for a second (literally). and take it off the heat.
Baghrir cooling before piling them (important)
Place each Baghrira on a clean kitchen cloth making sure not to overlap then when still hot. If you have a small work surface, you may only overlap the edges but not the centers.

Serve warm and drenched with a warm honey and butter mixture. 

Consider serving baghrir with a nice scoop of vanilla ice-cream to a nice dessert..Yummy!

Honey-butter sauce (equal amounts)

On a low heat, melt the butter, add honey and give it about 30 seconds to melt and blend.  Add a few drops of orange blossom water for a Fassi version.

Either you pour this sauce over each baghrir or, as we generally do, drench each top of baghrir by soaking it directly into the pool of sauce then reversing it and placing it in a serving dish. When they're piled, each baghrira feeds the other with the sauce and excess sauce will be usually collected by the last one.

Presenting baghrir

Take one baghrira with your fingers, dip the top (with holes) into the orange sauce and pick it up instantly (or it will soak too much sauce and might fall apart). Place the baghrir in a big plate, slightly overlapping each other.


Notes:
  • To freeze baghrir, I wait until they're cool. I use wax paper between each pancakes and stack them in a plastic bag then off to the freezer.
  • To cut on the resting time, double the quantity of baking powder.


Baked Msemmens or plain butter Rghaifs

$
0
0
These butter Rghaif or baked msemens are a treat for breakfast or afternoon tea time. They can be served plain along with jam or honey, or  sprinkled with sugar. They offer contrasting textures of soft layers in the inside and a crunchy outer layer.


I remember my eldest sister making a massive butter Rghifa by putting about 4 Msemmens inside each others. The result is a family-size baked treat which is also much easier to shape than individual ones.


You can sprinkle blanched, roasted and crushed almonds inside along with sugar and cinnamon for en even more indulging treat. It will look like a "Millefeuille". 

For today, I'm just posting the plain butter version which remains my favourite.


Butter rghaifs can have all these layers which can be even finer (see pic below)

Ingredients

Serves 8
Prep: 20 min - Resting: 30 min - Baking: 25-30 min

  • 350 g of strong white flour
  • 150 g of extra fine semolina or semolina flour
  • 1/4 tsp of dried instant yeast
  • 1 1/2 tsp of salt
  • 270 ml (+/-) of water, barely lukewarm
For laminating
  • 80 g of butter, soft to a creamy texture or melted and cooled
  • 80 ml of oil
  • 60 g of extra fine semolina or semolina flour
 For eggwash
  • 1 egg yolk or just melted butter


Preparation
 
Mix all ingredients and gradually add water to knead the dough.


Passed 10 minutes of kneading time by machine or 20 minutes by hands, you should get a soft  and elastic dough which is should not be sticky. Cover the dough for 15 min.

Oil your hands and divide dough into several balls double the ferrero chocolate balls.
Hopefully you get a pair number as we will pair each squares we will be making. 

Generously oil a tray when you can place all these dough balls. Oil them from each side and cover for another 10 min. See more about this method in the Msemmen post.
 

Follow the same guideline to make a coupled Msemmen or Rghaif but do not flatten in the last bit.


Place each coupled Msemmen on an oiled baking sheet. Leave at least 15 cm between each. Flatten slightly with your fingers. 


Brush the top of each coupled Msemmen with butter.

Preaheat the oven to 180 degrees C. bake until golden from top and bottom of each Rghifa.

Serve warm or at room temperature within a few hours of baking Rghaifs. The ideal drink to go with these laminated pancakes is a good Moroccan mint tea.


Fine layers of dough trapped in a crispy crust.

Note

The standard baked butter rghaifs are basically made with a square of laminated dough into another.
The bigger they become the more squares you can put inside then flatten the whole square.

Example: for a 26 cm square or round pan, you could have 3 or 4 msemmens laminated into each others, you will have multiple layers. There is butter between each two layers to enrich the dough and add good taste.


Special bakery almond macarons, a French/Moroccan treat

$
0
0
Macarons (I refuse to use add another "o") have gone viral during the last 7 years. Since I grew up in a mixed Moroccan/French culture these sweets were not a discovery to me. Yes I love how Pierre Herme reinvented these almond sweets. I particularely love the generous filling and the imagination he puts in all of them. How can one not like it! But hasn't the world gone overdosed with that?

The thing about Macarons is that all the Mediterranean coutries have their own version in a way or another, especially the almond-producing countries.

The other thing about Macarons is that they come in different shapes and textures than the trendy Parisian macarons which have invaded the web and the patisseries. Even in France, the early versions of these almond sweets depends on the region where it originated from. Sometimes, they have the same ingredients, only different in the look or the name. So yes, there is more to the macaron world than the sandwiched coloured ones with a filling.

We do have our array of Macarons which we call "ghrieba" and one of them is a bit like amaretti.Thn we have the walnut version, the coconut version etc...

Now, since Morocco is a former French colony, we happen to have some recipes which we grew up enjoying without thinking they were anything but not Moroccan. So we always had the classic trio of Parisian macarons sold in the posh bakeries (vanilla, chocolate, coffee).

One macaron that you find in Morocco, especially in the old Casablanca bakeries in the middle of forgotten streets is one that we all buy but don't bother making. So I did my research and tried a few recipes which claim they deliver the same result. Until I tried a French recipe of Lenôtre (THE one and only) where he reproduces Saint Emilion's macarons. It was it! The same texture, the same taste, the shape, except that we decorate ours with an almond while the French version does not ask for it.


Lenôtre's website generously shares the recipe and only a few blogs really went on to try it (French ones). The version available in Morocco looks different and rather like this here  only flattened and topped with an almond.

Let's wait for the rest of the foodies in this world to discover it after they wake up from the Parisian macaron's fever..They don't know what they're missing. It's not that glossy is the coloured ones but they're so tasty!

Free-form way almond macarons


The recipe I followed was adapted from Lenôtre page with a support from Chef Damien's video which is self-explanatory regarding the method. However, I worked around it to get what the Moroccanized macarons look like.

The Moroccan version won't have alcohol and I reckon they follow the staight forward method consisting of beating the egg whites, mixing and shaping. However, Lenôtre's method make them last longer.

I reckon the old way of making it involved using a proper ground almond instead of almond powder. I tried this option and I didn't need to add water as the almonds when turned to paste have a naturally perfect consistency.

Ingredients
Makes 
Prep: 20 min - Baking: 15 min
  • 200 g almond meal/ground almond
  • 75g + 75g of icing sugar
  • A pinch of salt (my addition)
  • 4 drops of almond extract (my addition)
  • 1/2 tsp of vanilla sugar (optional)
  • I used 2 tbsps of water ( I replaced alcohol in Lenôtre's recipe)
  • 10g of honey (I used a neutral one)
  • 60g egg whites (about 2 egg whites)

Preparation

Grind the almond powder along with 75 g of sugar to a finer texture for 15 seconds.

In a pot with a heavy bottom, mix the almond/sugar ix almond meal, sugar, honey, half of the egg whites and half of the water. Place over low heat. Mix with the back of a spatula until you get a sort of a paste. This will remind you of the panade we make for choux pastry.

The mix on the cooker, trying to break it and mix it

Keep mixing for 4 to 5 minutes. Transfer to a cold glass bowl and add the rest of the ingredients. Mix for about 2 minutes to combine and cool.

The mix after adding all ingredients

Cover a baking sheet with parchment paper. Bring 2 small spoons and a glass of water on the side. I use the water to wet the spoons when they start becoming sticky but also when I give the final shape to the macarons.

Not using a piping bag and keeping them "generously" plumped


Make sure you stick your baking sheet to the baking tray with some dough mix in all corners.

Using a piping bag

Preheat the oven at 165 degrees C.

Somehow, make small quenelles with the two spoons, try to turn each quenelle to a sort of ball. Place each one on the baking tray, leaving some space in between.You could also use a piping bag!


Wet your fingers and go around each macaron to give it a nice shape. Flatten it a bit and place a whole almond on the top of each piece.


Bake for 15-17 min until lightly golden.


Note

Follow the method shown in Chef Damien's video with his guest. You won't fail! 


My sister's lightly brioched croissants. A treat

$
0
0
This recipe for brioched croissants is an old one and it's quite a common version with way less butter than an all butter or brioched croissant. It is still indulging but without the massive calories..We call it cheap croissant because the ingredients needed are really what's available in every household, even the poorest.

This was the other croissant we grew up eating (besides the buttery one). The reason I say it's light is because I'm comparing it with the buttery laminated croissant.


These lightly brioched croissants can be sweet or savoury. The filling varies but you don't even have to fill them before baking. You could just use them for breakfast or afternoon tea and let the guest or your children decide how they want them. Sometimes, we serve Nutella or jam on the side. Quite a big hit with children after school.

These croissants are freezer friendly and really come in handy for a snack..What's not to like!


Croissants with chocolate fillings

For a classic all-butter croissant version, please check my previous post here.

For a classic almond croissant, please check here (in French).

To make these croissants with a savoury filling, double the salt in the dough but omit the vanilla sugar and 1/2 of the sugar required for the sweet version. You could also replace the lemon zest with herbs.


Ingredients
Makes + 10
Prep: 25 min - Resting time: 1 h + 1 h + Baking: 20 min

Basic brioched croissant dough
  • 500 g flour (strong bread flour) 
  • 1 egg, large
  • 50 g of butter, melted and cooled 
  • 1/2 tsp of salt
  • 100 g of sugar (I used 30g unrefined and 30g fructose)
  • 3 tbsps of dehydrated milk powder
  • 10 g Vanilla sugar 
  • 1 tbps of lemon zest (optional)
  • 20 g fresh yeast or 10 g instant dry
  • 200 ml (+/-) milk and water 50%-50%, lukewarm
For laminating
  • 100 butter, soft 
For the filling
  • 80g of chocolate
 Egg wash
  • 1 egg yolk and 1 tbsp of milk for glazing

Lightly brioched croissants with a savoury cheese and cold cuts filling

Preparation

Mix the yeast with 3 tbps of lukewarm milk/water. Set aside for 5 min.

Make a well at the centre of the flour. Add the rest of the ingredients. Knead the dough using a food processor for 8 min. Start with speed 2 for 4 mins. Flip the dough and go for speed 3 for 3 min. Flip the dough then another 3 min at speed 2/3.

Cover the dough and set aside to double in size. Depending on the temperature of the room, it could take between 45 and 90 min.


Roll the dough thin (2/3 mm). Smear with butter.


Form a big Moroccan Msemmen by folding opposite edges towards the centre to form a square which you need to flatten/roll to form a biiig square 2/3 mm thin.

Cut long strips of dough about 7 to 10 cm wide then cut triangles with about 8 cm base. Stretch the dough from top to bottom and at the base. Fill with chocolate and shape into croissants (check how we shape a croissant here).


Place on a greased baking tray (or cover with baking paper). Cover and set aside to proof. 


Preheated oven to180 degrees C. Egg wash and bake for 15-20 min until nicely golden.


They're best eaten at room temperature within the day of baking. Keep the rest refrigirated and slightly warm them in a microwave (7 seconds) or in a hot oven for only a few minutes.


You could freeze them for a longer period. Thaw and heat before eating them.


Moroccan "salade composée"

$
0
0
A Moroccan "salade composée" is a set of Moroccan salads plated in one massive dish and served before the main dish (well, it's a salad).

A salad composée made of precooked Moroccan salads
There are many salads you could put together side by side to make a Moroccan  "salade composée". But let's start with the first combination which was commonly presented before it got more elaborate and sometimes out of hands.

A refreshing salad composée with raw and cooked vegetables but separated 
 In the old days, there was a  "salade composée"  made with precooked vegetables and only a few raw others all around. There was a logic of plating and serving some vegetables together where adding others was seen as a lack of taste and blatant ignorance.

Another version of salade composée with raw vegetables (starch is cooked rice)

 So, the basic  "salade composée" would be a sort of Macédoine of vegables (carrots, potatoes, peas, maybe turnip) along with a mix of rice, corn and tuna. We also used to add steamed or boiled green beans, hard boiled eggs and potentially some boiled beetroot. The main condiments used are mayonnaise or/and vinaigrette. All these elements are nicely seasoned and and placed on top of lettuce leaves in a geometrical way.

We also used to place Macédoine in halved artichokes or only their heads..Everyone loved it.
.

If the salad has more raw vegetables then the cooked options will hardly be part of it.
 
A quick mix of cooked and raw vegetables. Pasta is the main starch 
 Nowadays, things got a bit more complicated and people put in pretty much what they think is okay for them. No rule applies anymore.


A classic macedoine (carrots, potaotes, peas) with seasoned raw vegetables for summer
So, use your imagination to create amazing displays of Moroccan salade composée by plating different Moroccan salads in a big plate. It always makes a good impression on guests.


Moroccan cucumber salad with orange and oregano

$
0
0
The weather is getting better and sun is back. Many of us are already thinking about light meals, salads and grills. So why don't you add this old Moroccan salad to your repertoire?

Moroccan cucumber salad is so refreshing and even my 2 years old toddler loves it. He actually had it in its juice version when he was 9 months old.

Packing my cucumber and orange salad for a picnic

Initially, we make this cucumber and orange salad with what's called Armenian cucumber but in Morocco, we refer to them as feqqous/Feggous. However, you can replace it with a common cucumber.


Feqqous is rather a furry cucumber and you eat it all, while some types of cucumber, especially the other one found in Morocco, requires a bit of peeling and sometimes we need to discard its seeds.

Common cucumber on top, Feqqous at the bottom

Armenian cucumber or feqqous is just as good on its own, no seasoning needed. But then when you make this Moroccan salad I'll be posting today, you'll love it even more. We even serve a version of it as juice, more on a liquid and sweet version. 
The inside of an Armenian cucumber

Every ingredient in this recipe is there for a reason and they should all come together in the end: vinegar/salt/sugar should not overpower each other. Orange juice, depending on its sweetness or sourness defines how much sugar is to be added.


Ingredients
Serves 4
Prep: 7 min

  • 500 g of cucumber, half peeled. Discard seeds if they're too big
  • 1/4 tsp of salt
  • 1 tbsp of sugar
  • 1 1/2 tbsp of plain vinegar
  • 1 tsp of dried wild oregano (or thyme)
  • 1/3 cup of freshly squeezed orange juice

My little one having a go on his own..


Preparation

Grate the cucumber either finely or roughly.

Mix all ingredients and set aside to cool before serving.

Serve in small bowls or deep plates.

The salad keeps well in a cold place for up to 24 hours.


Moroccan "salade composée" with cooked vegetables

$
0
0
A symmetrical display of Moroccan salads plated in a big plate is what Moroccan "salade composée" is all about.

Today's version is all about different precooked  salads which are left to cool before coming together in this colorful display.

This is also a salad using the main vegetables found in any Moroccan market.

Usually, long rice is used and mixed with mayo, corn and tuna to make what we locally call "Salade Mexicaine" but I prefer to use wheat because of the bite it brings to the lot. You could also use pearl barley, both cook in less than 30 min, especially if you have pre-soaked them for 1 hour.

The salad is just out of the fridge and ready to be served

The hard boiled egg and grated cheese is also a standard garnish so don't go beyond your limits and look for quails or cold cuts of you don't have them.


All these salads can be made one day in advance except for the rice and wheat (They tend to taste different the next day). Just season with vinaigrette the same day you will be plating them.

The weigh of all the ingredients listed are to be used as an indication. You can add more or less vegetables depending on your serving plate.


Ingredients
Serve 6 
Prep: 20 min - Cooking: 25 min

Rice or wheat salad

  • 200 g of long rice or wheat, cooked to tenderness in salted water and drained
  • Green olives and gherkins, chopped
  • 100 g of can tuna, drained
  • 50 g of can corn, drained
  • A handful of green beans, cooked with rice or wheat
  • 3 tbsps of parsley, chopped
  • A few tablespoons of vinaigrette (*)
  • Mayonnaise to bind the mix
Carrot salad

  • 300 g of carrots, peeled and cut in small cubes and cooked in salted water (or steamed)
  • A few tablespoons of vinaigrette (*)
Courgette salad
  • 300 g of courgettes, sliced or cut in cubes and parboiled in salted water
  • 1/2 clove of garlic, chopped or grated
  • 1/2 tsp of cumin
  • 1 tbsp of parsley, chopped
  • 1 tbsp of coriander, chopped
  • 2 tbsps of olive oil
  • Salt and pepper to taste
  • 1 tbsp of lemon juice
Green beans
  • 300 g of green beans, sliced or cut in cubes and parboiled in salted water (or steamed)
  • 1 clove of garlic, chopped or grated
  • 1/2 tsp of cumin
  • 1 tbsp of parsley, chopped
  • 1 tbsp of coriander, chopped
  • 2 tbsps of olive oil
  • Salt and pepper to taste
  • 1 tbsp of lemon juice
Potato salad
  • 300 g potatoes, peeled and cut in small cubes and boiled in salted water (or steamed)
  • 1/2 tsp of cumin
  • 2 tbsps of parsley, chopped
  • Vinaigrette (*)
Beetroot salad
  • 300 g of beetroot, boiled in salted water, then peeled and cut in cubes or sliced
  • Vinaigrette
Garnish
  • Mortadella cuts 
  • Edam cheese cuts (or any hard cheese)
  • Boiled quails eggs
  • 1 egg, hard boiled
  • A few lettuce leaves
(*) Vinaigrette

  • 40 ml of olive oil 
  • 10 ml of white vinegar
  • 10 ml of lemon juice
  • 1 tbsp of salt
  • 1 tsp of black pepper


Preparation

Cook the rice or wheat with peas until tender. Wash and set aside to drain.

Mix with the rest of the ingredients, correct the seasoning, cover and keep in the fridge.

At the same time, peel and cut the carrots and potatoes. Either you place them side by side along with green beans in a steamer and cook them that way or you boil them in separate pans. Drain and set aside to cool.

Boil or steam the beetroot. Peel it and cut it into small slices or cubes. Set aside to cool.

Mix the vinaigrette and set aside.

Saute the courgettes with garlic in olive oil for 1 minute, season with the rest of the ingredients. Once cool, mix in the lemon juice.

Mix each set of ingredients as listed above (main list of ingredients). Set aside to cool.

Grate the hard boiled egg and sprinkle on top, decorate with halved quails eggs, cuts of Mortadella and cheese.

Start by placing the lettuce leaves all around the big serving plate.

To plate the big "salade composée", make sure you do it in a symmetrical way so people from both sides of the table can reach the same set of vegetables.

Serve chilled.


Chaussons au thon or mini tuna and cheese turnovers

$
0
0
Tuna turnovers or empanadas are a bit of an international recipe which revolves around a dough and a tuna filling.

I like this simple version with cream cheese which can also be served as triangles or rolls, using phyllo or ouarka sheet for a lighter version.

This is not how my mother makes it. She actually uses a regular shortcrust dough or a rough puff pastry..


Since I started making the cream cheese or fromage blanc dough, I decided that this is the right wrapping for these mini-bites which are quite welcome at any time of the day.


Ingredients
Makes  about 10 - 12 mini chaussons
Prep: 20 min - Resting time (for the dough): 20 min - Baking : 20 min

The dough which is an equal amount of cream and flour + 1/2 of that amount in butter
  • 180g of cream cheese (petits Suisses, kirri, philadephia, or anything similar with 40% fat)
  • 180g flour, sifted 
  • 90g butter, at room temperature
  • 1/2 tsp of salt
  • Ground black pepper
  • 1 tbsp of parsley leaves, finely chopped (Optional)
The filling
  • 200 g can tuna meat, drained
  • 200 g of cream cheese or Jben (Moroccan cheese)
  • 3 - 4  tbsps of chopped spring onions
  • 2 tbsps of parsley leaves, chopped (or 1 tbsp of chives)
  • Salt and pepper to taste 
  • A generous pinch of paprika or chili powder
  • 1 tsp of lemon zest (optional)
Eggwash and finishing
  • 1 + 1 egg yolks
  • 1 tbsp of milk or water


Preparation

Make the dough (ahead of time)

Drain the cheese at least a couple of hours before hand; kirri or philadelphia do not need draining but quark or petit suisse or any thick fromage blanc will still need this step.

Mix all the ingredients as if you are making a shortcrust dough: flour, salt and butter are mixed first for the crumbly texture, then fold in the cheese and form a bowl dough. And of course, DO NOT OVERWORK. 

Cover with a cling-film, place in the freezer for 10 min..

Now that's where you will make it look like a cousin of puff pastry:

Roll the dough, form an envelop (puff pastry) or a book buy folding the dough on 3 or 4 on itself. Turn it 1/4 and do the same two more time. 

If you haven't made puff before roll the dough to a rectangle (2 mm thick), then bring the right side to the centre then the left side, turn a quarter, roll in length and repeat...

Place in the freezer for 10 -20 min or about 90 min in the fridge 

Preheat the oven at 170 degrees C.

Make the filling (can also be done ahead of time)

Mix all ingredients and place ideally in the fridge.

Shaping the tuna chaussons/turnovers


Roll the cold dough thin between two squares of baking sheets. Cut into circles about 8 to 10 cm diameter/

Place about a teaspoon of filling in the middle of each circle and dip your finger in egg yolk and smear a bit of the edge with it. Bring the sides together to form a turnover. Pinch to seal.


Place each tuna turnover on a baking tray cover with a baking sheet.

Bake for approximately 20 min until the dough is colored golden form top and bottom.

Serve at room temperature.


Moroccan harissa paste using fresh peppers

$
0
0
Harissa is a North African spicy condiment with Tunisian origins. The recipe I'm posting today is just one of the many harissa recipes out there. It's also the one I prefer because it's made of fresh ingredients and it's HOMEMADE.

Making your own harissa is rewarding at many levels. You can adjust the heat, you are sure there are no chemicals added to it (such as that nasty red color usually found in mass-produced harissas).

Mild harissa, homemade
Since we cook with this harissa as well as serve it as a side condiment, we tend to make it mild by using more sweet red peppers than the hot ones. So you get it, If you want a hot harissa, you add more hot chili or put less sweet pepper.


My family makes 2 types of Harissa using either dried peppers/chili or using fresh ones (see notes). Today is about the second one.

Main types of peppers found in Morocco: long peppers are widely used in Moroccan cooking


Ingredients
For about 2 medium-size jar
Prep: 20 min - Cooking: 35 min
  • 1 kg of sweet red peppers 
  • 1/4 kg of cayenne pepper, more or less
  • 4-5 cloves of garlic, crushed
  • 1 preserved lemon, discard seeds only
  • 1 tbsp of salt at least
  • 2 dry bay leaves, 
  • 1/2 cup of olive oil


Preparation

Wash the peppers/chili.

Discard all the seeds and white bits inside the sweet red pepper and most of them in the hot chili.

Cut the sweet red peppers into chuncks and make sure you use gloves while chopping the hot chili.

Place all ingredients, except the oil,  in a deep heavy-bottomed pot and add about 1 cup of water. Cover and let simmer for 15- 20 min before getting to the next step.

Blend all ingredients to a paste and transfer to a saucepan/frying pan. Place over medium heat and add the oil.

Keep stirring until all the water has evaporated and the sauce look like a thick paste. Set aside to cool.

Place the harissa sauce/paste in sterilized jars and keep it in the fridge for months. You could also freeze a good quantity by pouring it into Ziploc or ice cube silicone forms.


Notes:

1/ Instead of tenderizing the peppers in a pot by letting them simmer for a few minutes, we could also steam them then blend them with the rest of the ingredients. Some people also like to concentrate flavors and cook them in the oven. It helps getting rid of the skin of each pepper, which gives a smoother harissa.


2/ Harissa with dried peppers/chili, Discard the seeds and leave the peppers in hot water for 30 minutes. Drain and blend into a food processor.

You will then transfer the mix to a frying pan and cook for a few minutes until it looks like a dark thick paste. Top with oil and keep in jars, in a dark place.

This harissa is usually flavored with caraway seeds, coriander seeds or cumin while garlic and preserved lemons could be omitted.


3/ Harissa is served with fish and other dishes, we also add it to spice up some salads and stews. Try this Harissa vinaigrette.


Moroccan carrot, yogurt and orange juice

$
0
0
This juice is one of my aunties' recipes although she is not the only one making it.

When summer shows its nose, juices become handy. Our mothers made sure there were homemade juices in the fridge for the whole family and particularly at midday. They also worked as dessert.

Carrot, yogurt and orange juice became fashionable in my world by the late 90s. It has an interesting texture and definitely makes you feel good. You just need to give it time to chill as it improves in texture and taste.


And one would think that mixing yogurt with orange will de-compose the milk in the dairy product but it won't happen..

Ingredients
Serves 2
Prep: 5 min - Cooking: 15 min- Cooling: 3 hours


  • 400 g of carrots, peeled (or more)
  • 120 g of vanilla yogurt
  • 1 cup of freshly squeezed orange juice (or more)
  • 1/4 cup of the water where you cooked the carrots
  • 1 tbsp of sugar


Preparation

Peel and cut the carrots roughly. Parboil them in water for 10-15 min. I like to keep them Al-dente. Set aside to cool.

Blend all the ingredients to a smooth texture. Taste the juice to see if the sweetness is ok.


Place in the fridge for a couple of hours to chill.

Serve chilled.

The carrot, yogurt and orange juice keeps well for 48 hours.


The same juice served after mixing it, it looks more liquid than when it's left to chill


Moroccan mussels in a tomato sauce recipe: Bouzroug be maticha

$
0
0
Mussles in tomato sauce is a dish which can be served as a main dish or as a cooked salad.

I decided to serve it rather warm-ish over couscous for a change, but also to make my husband eat couscous..I served it as a light meal, somewhere between a starter and a main dish too.

In today's post, I'll describe how to make a proper Mussels tagine or starter. I'll also add the rest of the ingredients to serve it in a more modern way.

The best couscous to use for this is a corn couscous or a fine semolina couscous. I personally steam my couscous but I understand some may want to shortcut and use the 5 minutes formula (mix with salt and water and wait 5 min until in plumps up). In this particular recipe, whichever way you follow does not really matter.


Mussels in tomato sauce given a modern treatment


Ingredients
Serves 4 to 6
Prep: 20 min - cooking: 15 min

Mussels in tomato sauce

  • 2 kg of mussels, raw and shell scrubbed and cleaned
  • 800 g of tomatoes, seeded and grated (or good quality chopped tomatoes from a tin)
  • 3 cloves garlic, crushed
  • 1/4 cup of parsley and coriander, chopped
  • 50 ml of olive oil
  • 1 bay leaf
  • 1/2 tsp of ground cumin
  • 1 tbsp of sweet paprika
  • 1/2 tsp of dried cayenne powder or a chopped fresh one 
  • Salt to taste 
For the prawns
  • 800 g prawns, peeled
  • Salt and pepper to taste
  • 1 clove of garlic, crushed
  • 5 tbsps of olive oil
For the couscous (double ingredients if you want more couscous)
  • 1 cup of dried  couscous (follow package directions to prepare it)
  • Salt to taste
  • 1/2 tsp of mixed peppercorns (black, white, red, green), crushed
  • 2 tbsps of butter
  • 1 tbps of parsley, chopped
For the garnish
  • 3 fresh tomatoes, chopped
  • Salt and pepper to taste
  • 2 tbsps of olive oil
  • 1 tbsp of white vinegar or lemon juice
  • Extra parsley leaves
  • Lemon wedges


Preparation

Again, you could enjoy the mussels in tomato sauce on their own or make this elaborate dish for a complete meal. 

Prepare the mussels in tomato sauce

Wash and clean the mussels. Drain. Put them in a deep pot and cover. Place over low heat.

Once they're open (discard the closed ones), turn of the heat. Set aside to cool, pick each mussel and discard the "beard". Keep the water released by the mussels.

At the same time, sauté tomatoes in half of the oil with spices and herbs for 15 minutes in a frying pan. Add a bit of water if needed.

Transfer the shelled mussels with their water to the tomato sauce. Cook on medium heat until most of the water has evaporated. Correct the seasoning.

Serve hot for a main dish or cold/warm as a starter.

Prepare the couscous

Follow package direction to prepare the couscous. Delicately mix with the rest of the ingredients.

Sautee the prawns

While the couscous in taking shape, sautee prawns for a couple of minutes and season to taste.

Serve the dish

Use a pastry circle to shape the couscous base. Surround it with prawns. Spoon mussels in the sauce on top of the couscous.

Spread the chopped and seasoned fresh tomatoes around the prawns.

Serve warm or at room temperature with lemon wedges.


Moroccan grilled liver kebabs/skewers with kidney and heart as a option

$
0
0

Liver, you like it or you hate it. I don't like red meat but I love a well cooked and seasoned liver, especially cooked the Moroccan way or nicely grilled over charcoal.

We grew up eating offal and what other people label as bizzare food. Like any old civilization, we practically eat the whole lamb/calf.

I'm starting this series about offal with the most famous offal skewers across Morocco. Sometimes, they come mixed with kidney and heart. The butchers will usually propose these two every time we ask for liver.

It's always advisable to buy fresh liver (no more than 48 hours) which has the least sinuses and vains possible.


Liver kebabs/skewers served in a fast food joint in Morocco. If you are in a hurry,
you can also order a sandwich with salad and kebabs on the go with harissa

A liver sandwich is part of Moroccan street food and it costs less than 2.5 £. Ordering drinks (tea or soda) and extra salad will set you around 4 £. How about that?

A hot Moroccan mint tea alongside liver kebab is a must, a mix of salt, cumin and cayenne is also a must

Ingredients
Serve 2 
Prep: 10 min - cooking: 5 - 10 min
  • 500 g of fresh young calf liver
  • 200 g of calf's heat or/and kidney (optional)
  • 80 g of suet around the kidney
  • 1 tsp of salt
  • 1/2 tsp of ground cumin (optional)
  • 1 tbsp of sweet paprika
To serve with the grilled liver kebabs

  • A mix of ground cumin, cayenne powder and salt


Preparation

Remove the transparent membrane surrounding the liver. Cut then liver into 1.5 cm thick filets then into 2 to 3 cm cubes. Cut the kidney and heart into similar cubes. All the cubes should have the same size so they cook at the same time.

Cut the fat/suet into small cubes or bits as we are going to place them between each couple of offals cubes. They're not to be eaten but they help with the grilling as they add moist and flavor.

Marinate the cubes for at least an hour to overnight.

Buy a good liver, peel it, marinate it and thread it in skewers. Easy!
Prepare the bbq/brasero and wait for the flames to go off and the charcoal to start developing a thin grey cover.

Thread the cubes of liver, alternating with the suet. Do not leave any empty space in between but do not overload the skewers either. We usually have 6 to 8 cubes in each skewer.

In separate skewers, thread heart and kidney cubes, alternating each couples with suet bits.

Grilling liver, heart and kidney skewers over a traditional brasero

Place  the heart/kidney kebabs first as they take double the time than liver. Make sure the flame does not reach the skewers.

Make sure all kebabs are grilled but remain soft from the inside. Avoid serving a rubbery heart or kidney kebab.

As for the liver kebabs, they should be grilled through but the inside should remain soft (cooked but juicy).


No one likes an over-grilled and gritty liver but no one like am uncooked liver either.

Serve hot from the grill, generously sprinkled with cumin and cayenne powder.

Make sure you have a hot Moroccan tea and a good sandwich bread (baguette) to go with it..

We also like to serve fresh tomato/onion/cucumber salad on the side of these grilled kebabs.


Note:

The same recipe can be followed to make Moroccan kidney and heart skewers/kebabs.


Moroccan corn and semolina harcha galette with cheese stuffing

$
0
0
Cornmeal or polenta grits takes a common Harcha galette to a whole new level of flavour and texture. In some parts of Morocco, cornmeal is a big thing as it's used to make couscous, bread, galettes and sweets.

Making a 100% cornmeal harcha would be a difficult thing to achieve since the mix will constantly crumble, leaving you nowhere near a perfectly shaped harcha. Mixing the cornmeal with regular coarse semolina will get you there.

I usually go for 30% polenta and 70% regular coarse semolina. It's my safe ratio.

I like to stuff this particular harcha with a homemade jben (substitute with cream cheese) which I like to flavor with thyme or oregano.


Ingredients
Serves 2
Prep: 7 min - Cooking: 15 - 20min
  • 75 g of coarse semolina + extra for the sprinkling
  • 45 g of polenta/cornmeal grits
  • 1/2 tsp of salt
  • 1/4 tsp of baking powder
  • 10 ml of olive oil
  • 70 ml of water
For the filling
  • 4 tbsps of jben./cream cheese
  • A good pinch of thyme/oregano
  • A good pinch of ground black pepper


Preparation

Mix dry ingredients with the oil. Work these ingredients with your fingers making sure all grains have been properly coated. This should take about 15 seconds.

Slowly incorporate the water to the mix and bring the dough together. It does not need any extra work. The mix will absorb the liquid quite fast.


Halve the dough, flatten the first part no more than 3 mm. Delicately spread the cheese without getting to the edges.

Slightly oil a thick non-stick skillet with oil, lightly sprinkle with semolina.

Sprinkle a work surface with semolina. I find it easy to shape my harcha over aluminum foil or directly in the pan before placing it over the cooker.

Flatten the rest of the dough between your palms and place it on top of the cheese very much in the middle. Try as much as you can to spread it all the way through and cover the cheese.

Flatten the harcha and use your fingers around the edges to shape a perfect circle. Basically, this harcha should be 4-5 cm thick but no more. Ideally, cheese should be trapped inside and nothing peeks out.

You could also use a round cutter and make individual mini-harchas.


Place the pan over medium heat in the first 2 minutes then bring it down to low heat (I use 3/4 over 12 in my electric cooker).

Cook each side for 7 minutes. Flip over using the back of a plate to cook the other side.

Serve warm or at room temperature during the same day.


For a variation with spring onion (a regional specialty), just chop in 1 spring onion and mix it with the dough.


For more harcha recipes (baked or cooked in a skillet), check these posts:


Crunchy Moroccan Halwa del Qsseb and Debla

$
0
0
If you see these you might think they're cousins of Sicilian cannoli. Maybe they are. 

It seems that cannoli is a version of an Arab sweet from Baghdad which has made it to Sicily centuries ago. The name came from "qanawats" which means pipes or channels in Arabic. Theories are out there as for the origin, but let's concentrate on the yumminess of these. 

Since the dough is not sweet, dipping them in honey will bring the perfect sweetness

Well in Morocco, where this sweet was also famous at some point, is disappearing slowly but surely. Same thing for its quicker version made using a fork while frying it..

To make this Halwa del Qsseb, we use these bamboo pipes easily found in Morocco. They're used to roll silk threads which is used to embellish traditional Caftans. 

You could use the metallic ones commonly found in pastry/baking aisles but I have to say that using these bamboo rods gives an authentic flavor to these fried sweets. It's a bit like using an unglazed tagine versus a glazed one to make good Moroccan tagines.. 


The same dough is used to make fork-shaped crunchy fried sweets across Morocco. Their name would be just "halwa del fourchette" or "Debla". It consists of trapping a strip of dough in a fork, frying it and rolling it as you go..

I made these using a fork to shape them while they were frying
So here I give you The humble Moroccan halwa dial Qsseb (Pipe/Rod's sweet). 


Before we start, I want you  to make sure of the following:

  • Roll the dough thin,
  • Prick the roll dough it with a fork,
  • When you roll the dough around the pipe, make sure you stick the end firmly,
  • Fry on low-medium heat..The oil should not be too hot or they wont fry properly,
  • Once fried, release them from the pipes/rods.


Ingredients

Makes 24+
Prep: 20 min - Frying: About 3-4 min per batch

• 250 g of all purpose flour
• 1 tbsp of vanilla sugar or 1 tsp of vanilla extract or beans from 1 vanilla pod
• 30 g of butter, soft
• 3 tbsps of orange blossom water
• 120 ml of milk, lukewarm
• A pinch of salt

For frying
  • About 1 1/2 l of oil for frying
For finishing and decorating
  • 250 g of warm honey for dipping OR
  • Icing sugar for dusting the halwa
  • 100 g of blanched and fried almonds, roughly crushed

They're a wonderful garnish to vanilla ice cream
Preparation

Prepare the pipes

Soak the pipes in boiling water mixed with vinegar for a few hours.

Use a serrated knife to cut them into 2 unless you have a big pan and you want to make big halwas.

Drain and dry them with a kitchen towel. Slightly oil them from the smooth side.


Make the dough

In a bowl, combine all ingredients and work the mix about 2 minutes to have a smooth dough.

Place the dough in a plastic bag and set aside for 10 min.  Generously prick the dough with a fork.

Roll the dough about 1 mm thin and then cut squares about 6 cm large.


Roll each square around the rods/pipes. Make sure you pinch the end of the dough very well so it won't open during the frying step. You also need to make sure the ends of the pipes are not all covered with dough so it comes out after frying.


Frying and finishing Halwa del Qsseb

Heat the oil into a deep pan to medium. Start frying a few halwas, leaving space between each one.

If you see that they color fast, reduce the heat. They should fry to a golden color all the way through. They also have to be crispy and crunchy.

Place each halwa in a sieve and let it cool for 5 min. Push the pipe/rod out of the Halwa del Qsseb, it should come out without problem.

Drizzle honey or dip and roll them in. Roll each honeyed fried halwa into almonds.

You could generously dust them with icing sugar.

Serve at room temperature.

Keep extra halwa in a container or a Ziploc for a few days and serve when you want to indulge with a crunchy treat.


Moroccan giant fennel salad recipe: Shlada del boubal

$
0
0

Do you know this vegetable/herb? have you seen it before? In Morocco, we call it boubal (Fr: Grande férule, férule commune, faux fenouil). In English, it's called "giant fennel" or "African ammoniacum". It's giant since it's plant grows for about 3 m long.


Having tried it, I just can't get my head around the "fennel family" thing. It tastes nothing like it. It's like a a giant hippie asparagus and it tastes more like it.

Then I've read online that despite the name, it's really not from the fennel family. Pheww..Well that should comfort me.

I took theses pictures about 3 years ago when I was in Fez where this salad is still prepared during a very short season.

The method of preparation is very much to the merfouss of fresh young broad/fava beans: steaming the vegetable, preparing a chermoula with generous addition of olive oil and sauteing the mix.

If you get hold of this weird herb/vegetable and make this boubal salad, make sure you serve it well chilled. Eat it warm or hot and you're in for a serious stomach discomfort.


Ingredients
Serves 4
Prep: 10 min - Cooking: 30 min
  • 1 bunch of giant fennel (boubal, see picture above)
  • 3 cloves of garlic
  • 1 tsp of ground cumin
  • 1 tbsp of sweet paprika
  • 1/4 tsp of cayenne
  • 30 ml of extra virgin olive oil
  • Salt to taste
  • 3 tbsps of lemon juice
Optional additions
  • 2 tbsps of coriander, chopped
  • 1 tbsp of parsley, chopped
For garnishing
  • 1/2 preserved lemon, cut into small wedges 
  • 1 tbsp of extra virgin olive oil


Preparation

Separate the florets from the stem, Wash them in cold water.

Cut each into big bits. Place them on the top of a couscoussier or a steamer but make sure the stems go in first followed by the florets. Cover and steam for about 20 minutes or until they're tender.

In a frying pan, mix all the other ingredients except the lemon juice and sauté for a few seconds, Add the boubal and break it with a spatula into the spice/herb mix. Stir for a few minutes until all liquid has evaporated. Correct the seasoning.

Set aside to cool. Mix in the lemon juice and drizzle some good olive oil.

Serve chilled, never warm or hot!

The boubal salad keeps well in the fridge for 3 days.


Moroccan bull's tail and penis stew

$
0
0
Some food is weird in some countries but it's not in others. Old civilizations were not all about filleting the meat but rather consuming the whole animal. 

Well, this post I've giving you today is years overdue. The reason? Everytime I was thinking to publish its content, I just couldn't get passed the word "penis. Private parts? not working, because it would include testicles, which is used for other dishes and not this one. 


Then again, this is a food blog and I'm writing about everyday Moroccan food. So there you have it: A stew of tail and bull's penis cooked Mchermel style and I love it (passed the name)..

Now, I've been eating this stew and liking it. It never occurred to me to ask where that white part came from. When I did, my mother gave me a wrong answer (willingly). Then I started writing about food. Then I went to the market, with my mother, to trace that bit back. I took pictures, for you, yes you, reader behind the screen so you know what this looks like before and after cooking.

And it's not like this bit of bull's private part is something the butcher is smuggling or selling in secret. Not at all! It's for anyone who wants to buy it, old people like my mother and my father before here. I don't think the new generation is heavy on it..

Guess now who's asking what that weird bit in the stew is? My nieces. My mother is still giving misleading them, until they want to cook it themselves and would want to buy it! There will be in for a shock, the way I lived it myself.


Passed the shock, this dish is so nice! Give it a try! Or at least you would have discovered that we have this in our Moroccan cooking repertoire, something you won't find in cookbooks.


Ingredients
Serves 6 to 8
Prep: 10 min - Cooking: 6 hrs (slow cooking, tanjia-style) / 1 1/2 h (pressure cooker)

First set of ingredients
  • 1.5 kg of tail and penis section, cut into sections 4 cm long
  • 2 medium-sized onions, finely chopped
  • 2 tbsps of olive oil
  • 1 tsp of salt or to taste
  • 1/2 tsp of ground pepper
  • 1/2 tsp of turmeric
  • 1 tbsp of ground ginger
  • 3 to 4 cloves of garlic, crushed
Second set of ingredients
  • 1 tbsp of paprika or tomato paste
  • A small bouquet of parsley, tied
  • 3 medium-sized tomatoes, grated or finely chopped (discard seeds and skin and keep the pulp)
  • 3 tbsps of extra virgin olive oil
  • 2 tbsps of lemon juice or 1 tbsp of chopped preserved lemon

Garnishing
  • 1 tbsp of parsley, chopped
  • Purple or green olives
  • Preserved lemon
  • 1 tbsp of extra virgin olive oil


Preparation

Mix all ingredients listed in the first set of ingredients in a deep pot (or a pressure cooker). Cover with water and cook until the tail and penis bits are tender. Add water if needed. you need to check the tenderness by pinching the meat (well, it's not meat technically, is it? but some of it is). They do take time to cook. If you have a crock-pot, it's the time to use it. 

First stage of cooking

Add the second set of ingredients to the first, except the lemon. Cover the pressure cooker or the cooking pot. Carry on cooking for another 20 min. Stir regularly.

Bull's penis sold at a weekly village market
A few minutes before serving, add the lemon juice or preserved lemon, 1 tbsp of olive oil. Stir. Correct the seasoning.

Bull's tail, incredibly melt-in your mouth after cooking for hours.

The sauce should be reduced before serving.

Transfer the stew into a plate and serve warm along with a good bread.

Since it's a bit of a sticky kind of "meat",  people might need to digest it with mint tea at a later stage.
Some people add strips of char-grilled red capsicums just like they would do for "djaj bel felfla mechouiya " (chicken with char-grilled or gaz-grilled capsicums) which is another old recipe.


Moroccan calf/lamb trotters and wheat recipe

$
0
0
Slow-cooked Moroccan calf trotters or HergmaHargma (or Fraqesh) dish is a nation favourite. In cities like Marrakesh, it's even a dish you could eat for breakfast.  Hergma is as old as Morocco and even before.

Hergma comes with chickpeas and wheat kernel or white beans. It may also have raisins/sultanas or figs for an even stickier version. The best hergma is slow-cooked overnight, in ashes or very low heat in a clay recipient called Tanjia (a jar-looking clay recipient used to transport oil in Roman times).

The basic spices for a standard hergma are ground ginger, ground pepper, sweet paprika, turmeric and saffron. The additions (depending on the type of hergma cooked)  are cumin, cinnamon, Ras El Hanout. Coriander and parsley are also optional. Those are decided based on the topping accompanying the dish.

Homemade hergma with chickpeas and wheat kernels

Hergma is also a cousin to the centuries old Moroccan Sephardic dish called Dafina or Skhina, prepared for Shabbat.

There are many variations to this dish but this is how I like it, simple, slow-cooked, not overly spiced and never on the sweet side.

Hergma is part of the Moroccan street-food list of things to try

In Modern Moroccan homes, pressure cooker are shortening the time to cook this scrumptious hergma dish of calf trotters. We pre-soak the chickpeas and wheat to speed up the cooking process. However, should you want to make it the old ways, do not pre-soak anything. After 6 hours of cooking, chickpeas and trotters will have plenty of time to come together nicely.


We prefer to use calf trotters rather than lamb because there is not much to eat in a lamb trotter whereas calf trotters are richer and highly glutinous.

You need a cheesecloth to cook the wheat kernels and a pressure cooker to make this dish. You could also use a dutch oven if you choose to slow-cook it in an oven for longer hours.

Hergma dish needs to be reduced and serve hot to warm. The sauce is usually thick and your fingers might get sticky. It's highly advised that a hot tea is served after it.

Even if you are not into trotters, you need to give the sauce and wheat a try!


Ingredients
Serves 4 to 6 
Prep: 10 min - Cooking:  1 1/2 hour (pressure cooker) to 6 hours (slow cooked)

Main hergma stew
  • 2 calf trotters (about 1.4 kg), preferably the ones form the front, cut into 3 each and washed thoroughly
  • 2 medium-sized onions, finely chopped
  • 3- 4 cloves of garlic, chopped
  • 1/2 tsp of turmeric
  • 1 tsp of ground pepper
  • A good pinch of saffron thread
  • 2 tbsps of sweet paprika 
  • 1 tbsp of ground ginger
  • 1/2 tsp of cayenne (optional)
  • Salt to taste
  • 4 tbsps of olive oil
  • About 2 l of water
Accompaniement
  • 250 g of chickpeas, presoaked overnight
  • 250 g of wheat kernels, presoaked for a couple of hours

Calf trotters/feet, sold in a local market, Butchers burn the hair
for a few seconds on direct fire then scrub the trotters and sell them ready to use. 

Preparation

In the pressure cooker or a Dutch oven/crockpot, add 1 cup of water, the spices except the cayenne and paprika, garlic and the calf trotters. Stir and place on a medium heat for 10 minutes.

Then add enough water to cover the calf trotters and cover/lock. Cook on medium heat for about 1 hour (pressure cooker) or more if you are using a slow-cooking method. The trotters should be almost cooked before you add the other ingredients. If they're young and cook fast, fish them out and keep them covered.


Add the cayenne and paprika to the sauce and stir.

Place the washed wheat kernels in a cheesecloth and tie it up. Place it in the sauce along with the chickpeas. In case you see the level of liquid very low add more to cover the ingredients added.

Cover loose and cook for another 30 min or until the chickpeas are tender and trotters are easily falling of the bones. The sauce should be thick and reduced.

In a warm serving dish, place the trotters, followed by the chickpeas, then the sauce and finally top with wheat kernels.

Always serve warm. Should you have leftovers and want to reheat them, add a bit of water to loosen the sauce.


Moroccan stuffed vegetables/Dolma with rice

$
0
0
Stuffed vegetables or Dolma is a Mediterranean family dish with a few variations depending on the countries, wether related to the type of vegetables used, the spices or the herbs. However, the idea is the same: core the vegetables and stuff them before cooking them to tenderness.


The Moroccan version also depends on families and their preferences.

When I was living with my parents at a young age, I do remember that both of them cooked stuffed vegetables, only for some reason, my father's version tasted better than my mothers. This is something she won't admit but I remember that my father's version of the dish had properly infused bay leaf and a thick sauce in it. And I liked it that way!


Some people use pressure cooker to make this dish, which obviously takes less time, especially for working parents (like mine, in the old days).

But then you could also cook the stuffed vegetables in a deep cooking pot over gas and finish it off in the oven which is what my father used to do.

I decided to cook mine in the oven, sealed with foil so nothing escapes..


Ingredients
Serve 2 to 4
Prep: 20 min - Cooking: 1 to 2 hours (over a cooker or in the oven)
  • 2 courgettes or zucchinis (long or round ones)
  • 2 medium-size potatoes, peeled
  • 2 large carrots, peeled
  • 2 medium-size tomatoes
  • 1 medium-sized onion, chopped 
  • 300 g of tomatoes, peeled, seeded and chopped (or tinned)
  • 2 bay leaves
  • 1 clove garlic, grated
  • 2 tbsp coriander, chopped
  • 1 tbsp of parsley, chopped
  • 1/2 tsp of ground ginger
  • 1/2 tsp of ground cumin
  • 1 tsp of sweet paprika
  • 1/2 tsp ground pepper
  • 1/2 tsp of cayenne (optional)
  • 1 stick of cinnamon
  • Salt to taste
  • 1 + 2 tbsps of olive oil

For the rice filling
  • 1/2 rice, long or basmati, washed and presoaked for 30 min
  • 1/2 cup of the chunky bits from the tomato sauce cooked above
  • 1 bay leaf
  • 1/4 tsp of turmeric
  • A pinch of saffron threads (optional) 
  • Salt and pepper to taste

Garnish
  • Chopped parsley
  • 1 tbsp of olive oil


Preparation

Core the vegetables,keep what's been removed on the side, except for the carrots. Place all vegetables in a bowl.


In a deep cooking pan, saute half of the chopped onions for a few minutes along with the bay leaves(use 1 tbsp of oil). Add garlic, followed by tomatoes and all the spices/herbs. Stir and let simmer for a couple of minutes.

Add about 1 cup of water and let simmer, covered, for 15 minutes, over medium heat.

At the same time, bring 1 cup of water to a boil, add the spices and the bay leaf. Add the rice and cook for 5 minutes (basmati) and 15 minutes (long rice). The rice should be half-cooked.

Drain and set aside to cool.


Fish out the large bits or tomatoes and onions using a regular tablespoon or a frying spatula. Mix all those bits with the rice.

It's important that the rice is halfway cooked as it will carry on cooking in the sauce.

Stuff the vegetables with the rice mixture.


In a deep baking pan or a heavy-bottomed saucepan/cooking pot, scatter the rest of the chopped onions at the bottom, the bay leaves from the tomato sauce. Place the vegetables side by side along with their cores. If there is any leftover rice, form balls with your hands and place them there too.


Add about a 1/2 cup of water to the tomato sauce, correct the seasoning. The sauce should cover at least 2/3 of the vegetables.

Cover and bake (at 160 degrees C, sealed with foil) or cook on medium low heat.

Garnish with chopped parsley and a drizzle of olive oil.

Serve warm.


Note 

For a non vegetarian version of Moroccan stuffed vegetables, add:

-1/2 cup of ground beef which you season with
- Salt
- A generous pinch of cinnamon
- A pinch of ground pepper
- 1/2 tsp of ground cumin
- 1/2 tsp of sweet paprika
- 1 tbsp of olive oil

Mix all the ingredients with your hands and then mix the ground meat with rice. Stuff according to the recipe


Moroccan cow/calf or sheep brain's with tomato sauce and chermoula

$
0
0
Still on offal cooked the Moroccan way, here is a dish mainly cooked during the feast of sacrifice and served as a cooked starter: Cow or sheep brain cooked in a tomato sauce.

In Fez, this cooked salad is also served during family gatherings and usually the plates go back empty.


This cooked Moroccan starter is cooked Mchermel style. The vinegar (not lemon) adds an acidic note to the spiced tomato sauce which has a bit if chermoula mix in it. It balances the dish perfectly.


Ingredients
Serves 6
Prep: 15 min - cooking: 30 min

  • 4 sheep brains or 2 calf brains
  • 400 g of tomatoes, seeds and peeled them chopped
  • 3 - 4 cloves of garlic, chopped
  • 1 tbsp of vinegar
  • 1 tbsp of sweet paprika
  • 1 tbsp of tomato paste (optional, for colour and acidity)
  • 1/4 tsp of cayenne
  • 1/2 tsp of ground cumin
  • 3 tbsps of coriander, chopped
  • Salt to taste
  • 4 tbsps of extra virgin olive oil


Preparation

Wash the brains. Basically sheep's brain hardly needs any peeling, You just discard any bloody bit while if you have bought calf's brain, you will need to peel off all the veins and the bloody bits. Do it delicately using your fingers. To ease up the process, you can dip the brain in boiling water with  a couple of tablespoons of vinegar for 30 seconds (no more) and pull it out.

Optionally, you can marinate the brain in vinegar, spices and herbs and cook it later

Cut the brain into chunks and mix them with the herbs, spices and vinegar. Set aside while the tomato sauce is in the making.

Over medium heat, mix the tomatoes with the garlic, stir and cook for about 3 minutes. Add about 1/2 cup of water and let simmer for 10-15 minutes.

Add the chunks of brain into the sauce, stir and make sure all sides have been in contact with the tomato mix. Cover and let simmer for 15 to 20 minutes over medium heat, the sauce should have thickened by them.

Stir in the olive oil just after you knock off the heat.

Some like a lot of olive oil in this dish, like my sister

Moroccan cow or lamb brain can be served warm, at room temperature or chilled. We always serve it as a starter.

The sheep or calf brain in tomato sauce keeps up to 4 days in the fridge.

Moroccan Rezzat El Qadi / Judge's turban : An all-threads pancake wonder

$
0
0

Rezzat el Qadi/El Kadi is a rather funny name for this Moroccan pancake. The reason why it's called so is because it looks like an Oriental Turban's judge (English translation of the Arabic name). Picture yourself placing one on your head, you'll get the idea.

Our judges don't place turbans anymore on their heads but the name remains to remind us the past.

You need some patience to make Rezzat el Qadi. You also need to make sure that the dough is firm, smooth and pliable due to a good long kneading. It's rather firmer than Msemmen dough. This is the trick to make it go through the spaghetti machine without incidents.


Rezzat el Qadi can be served drenched with honey just like a regular Msemmen or Mlaoui. But there are regional dishes where it is the base to a R'fissa dish, usually kept for big happy family events.

When I was in Assilah, I bought one mega Rezza or Rziza from a woman. It was about 2 kgs weight. I did ask her how is this rather regional specialty from a different part of Morocco ended up there in their Northern Market. She said they also have this pancake but they use it to replace vermicelli in our inland Chaariya bel hlib (vermicelli with milk soup). Coming to think of it. Rezzat el Qadi is a bit like long Angel's hair pasta anyway.

This mega Rezzat el Qadi definitely needs and experienced person to shape it with such finesse

Rezzat el Qadi is not part of the Fassi cooking repertoire and I know about it because I was brought up in Casablanca which is a city of melting pot with many rural specialties. So I've never seen anyone making it at home. We'd rather buy it since it's part of Moroccan Street Food especially during Ramadan.

When I moved to live abroad and YouTube as become a sensation, I learned how to make it. Practice makes perfect, and I nailed it at my third trial, after a wise woman in Morocco told me to keep the dough firm but knead it very well..That's all what I needed to get it right.

So here I give you the recipe and tutorial to make rezzat el Qadi the fastest and easiest way, using a pasta machine, a tool that Moroccans have accommodated to their Cuisine decades ago.


Ingredients
Serves 6 (I make mini and medium Rzizas)
Prep: 50 min - Cooking : 4 min per pancake

For the dough
  • 400 g of strong white flour 
  • 100 g of fine semolina flour (or strong white flour)
  • 1/2 tsp of salt
  • A pinch of dried instant yeast
  • 250 ml of water, lukewarm (maybe more depending on the flour's absorption, use a tablespoon to add any extra).
For shaping
  • 100 g of butter, melted and cooled
  • 60 ml of plain oil.
  • 4 tbsps of flour, for dusting


Preparation

Mix the dried instant yeast with 2 tablespoons of water and stir. Set aside for a couple of minutes until it dissolves.

Sift all dry ingredients in a work surface or a large bowl. Add the yeast, the salt and the water and mix (you could do this using a food processor or a bread machine). Mix for a few minutes to combine.

Transfer the dough to a working surface and knead it properly and energetically for about 15 minutes. The more you knead the dough (up to 25 minutes), the better. The dough is rather hard but it moistens as you go, it will come together nicely after all the kneading is done.

I found that alternating between a 5 minutes kneading and 10 minutes resting (covered) makes it easier for anyone who does not have strong wrists and arms (like me).

Shaping Rezzat el Qadi using a spaghetti machine


Form thick sausages of dough, Cover them with a cloth and let them rest for 15 minutes.

With your hands, lousely flatten each roll and gently stretch it lengthwise.

Set the pasta machine on a large number and flatten the dough from the lasagna section (Use # 1 or 2 for now). Turn to a larger number for a thinner dough.

Place each flatten dough on a work surface and lightly dust it with flour from both sides.

Bring the bowl of mixed butter and oil next to you. Oil your hands and then the dough.

With one hand, ass the dough through the spaghetti section of the machine while you collect it from the other side and roll it over a rolling pin, a thin bottle, a courgette/cucumber or just the handle of a wooden spatula. While you are doing this, feed it with more butter/oil mix and stretch it as you go. Having a second person to pick up the spaghetti looking dough from the other side will be handy!

Set aside each roll of dough. Drizzle a bit of butter/oil mix and give it a pat or two to flatten it and 10 minutes rest then flatten in even further. Shape the rest of the dough as described previously.


No spaghetti machine? No worries! Get a pizza cutter and cut small strings of dough.


Cooking/pan-frying Rezzat el Qadi

Place a non -stick heavy bottom skillet/frying pan on medium heat. Cook/pan-fry as many Rzizas as you can fit into the pan.

Delicately flip them on both sides for several times (at least 3 times in each side). It's better not to let the crust turn golden in the first time before flipping them.


The Rzizas are ready when they look nicely golden crispy from outside and their spaghetti-looking threads are separated from the inside.

Once out the pan/skillet, place Rziza in a kitchen towel and crush it by bringing the edges towards the center. It helps releasing the steam and also making sure than the threads are separated. Cover with the kitchen towel Rziza remains soft.

I also learned to steam Rezzat el Qadi for a couple of minutes before serving it so it stays soft all the way through. I managed to do it differently though. Once the Rziza is almost ready to leave the skillet, I cover it for a minute so the steam is trapped and it comes nice right there and then!

Serve them warm or freeze for another day.

Note: 

Shaping the dough in sausages depends on how big or small you want to shape the rezza... 

To make mini-rezzas, I shaped 30 cm tall * 2 cm wide sausages and halved them into two later on. Another time, I shape them about 20 cm tall and 4 cm wide to make slightly bigger rezzas...

Tall is not the problem as long as you can cut it..Wide would be a problem since the machine may not handle the corners properly when the dough is flattened.


Viewing all 290 articles
Browse latest View live